Slow performance in Photoshop can drive me nuts. Lately, since I’ve been working with very large files, it has gotten so bad, that I cannot even work properly. Trying to resize something, or rotate it correctly, when the display lags really badly is impossible. Making precise tweaks depends on seeing exactly what you are doing.
And so, I’ve been searching for solutions. Some I knew about, others I didn’t. In this article I will share everything I did to optimize performance. This of course could be different for you, depending on your needs and the way you work in Photoshop, but I hope you will find at least some of the information useful.
Part 01: Allocating more resources for Photoshop in Windows
In this article I’ll discuss changes I made within Photoshop, however, if you missed it – Check out part one, in which I walk you through a change I made in Windows, which had an enormous effect on Photoshop’s performance.
This article on Adobe’s website covers everything more thoroughly than I do:
https://helpx.adobe.com/photoshop/kb/optimize-photoshop-cc-performance.html
Another article I found useful:
https://www.beart-presets.com/blog/how-to-speed-up-photoshop
Jump around
- PSB vs. PSD
- Disk space & Scratch disks
- Fonts
- Photoshop performance preferences
- Efficiency percentages
- 8 bit – 16 bit – 32 bit
- Overlays: Grids & guides
- Navigator panel
- Layers panel
- Presets panels
PSB vs. PSD
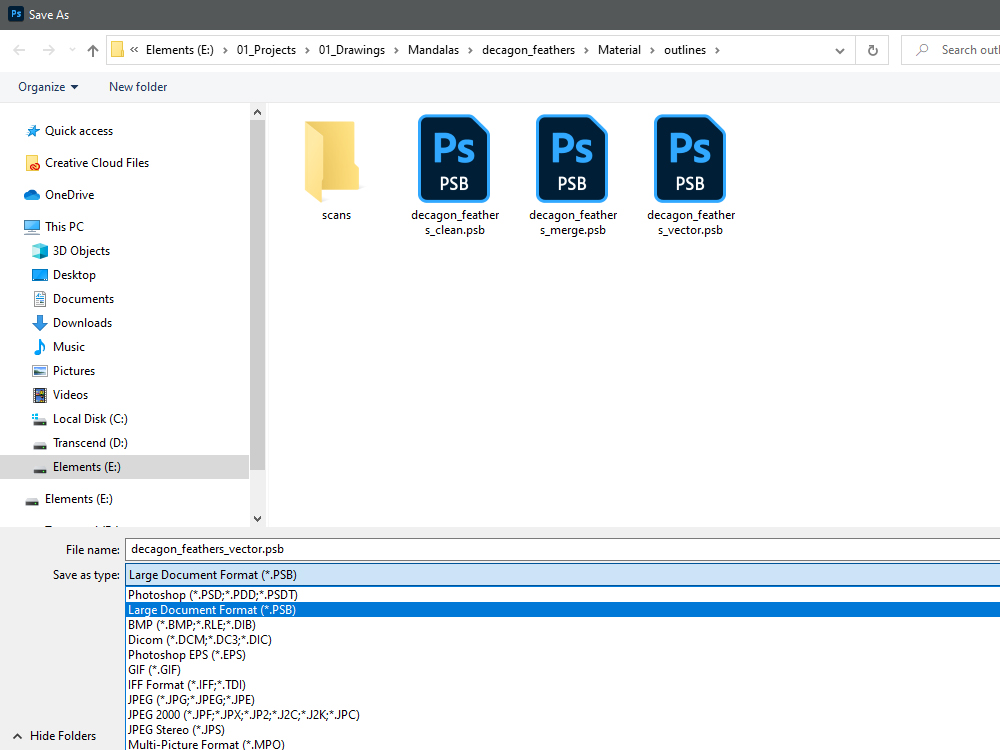
One of the easiest things you can do when working with large files is save them as PSB instead of PSD.
PSB is a Photoshop format that is intended for large files. Naturally, all your layers, paths, and extra data are saved just like with PSD.

Disk space & Scratch disks
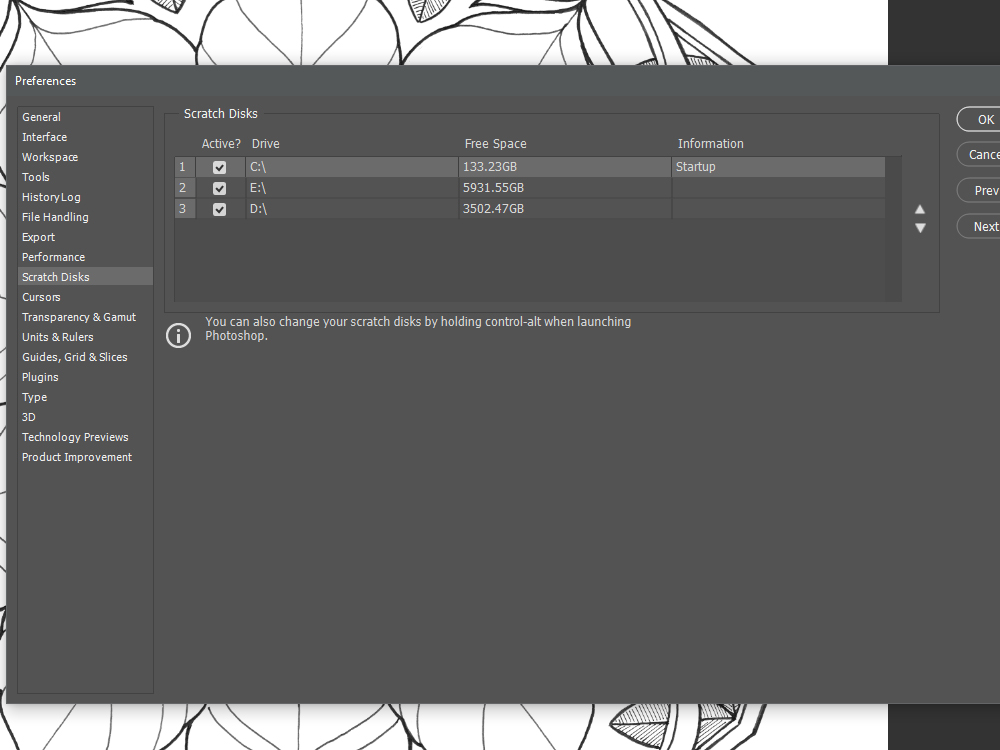
Like all other programs, if your hard disk is full, everything performs more slowly. So either erasing unused files and programs, or adding memory, internal or external will help. I have 2 external hard drives connected to my computer, and I try to keep the heavier stuff in those, so the C drive will have enough free space.
In Photoshop’s preferences, you can define your internal and external drives, in the order they should be used. I read a recommendation to keep an internal drive as the first (and main) one.

Fonts
Having a lot of fonts installed on your computer stops being fun when you realize how much it slows software performance. What happens is that every time you open an application, it loads all those installed fonts, so they are available for your use. The more fonts are installed, the longer it will take. When Photoshop is loading, you can see in the splash screen if the fonts are taking a long time to load. I can’t remember exactly, but it writes something like:
“Loading OpenSans-Regular.ttf…” with the file names changing.
One possible solution for that is to use a Font Manager, in which instead of installing all your fonts (and burdening the system), you turn fonts on and off, so to speak, according to your need.
You can read more about that in this post. It’s old, but still relevant: NexusFont review: a wonderful tool for sorting your fonts
Photoshop performance preferences
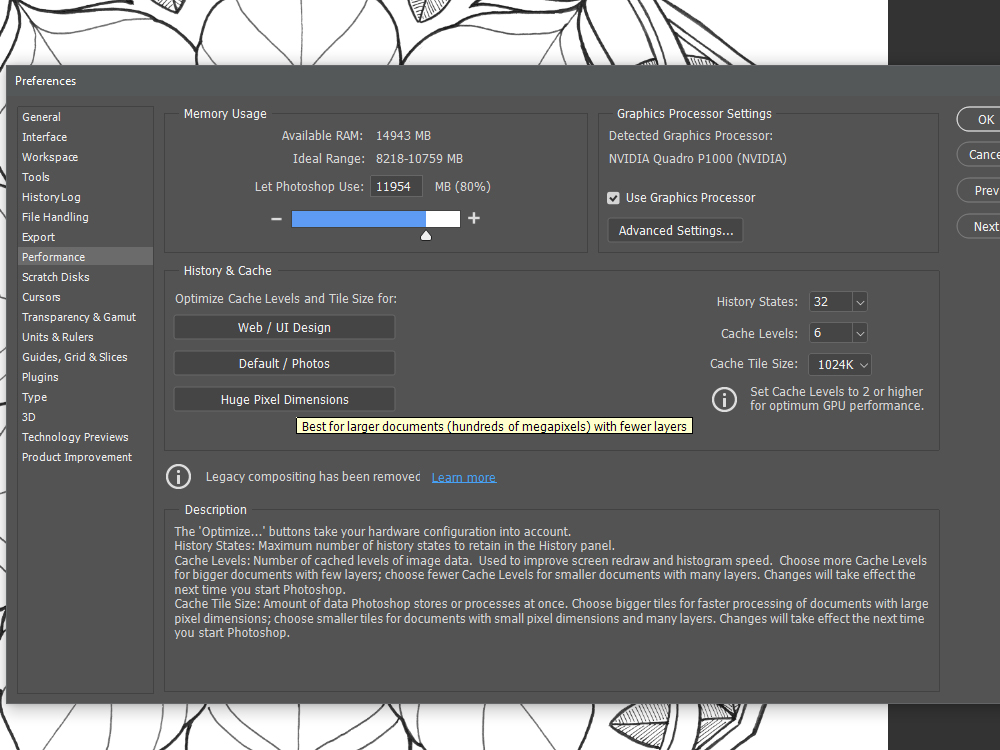
In Edit > Preferences > Performance you have quite a few ways to define how much memory is allocated to Photoshop, according to your usage of the program.

You can find a lot of information on how to go about it on the web, and in the Adobe article mentioned above. These are the preferences I have currently.
I let PS use 80% of the RAM, am working with the Huge pixel Dimensions setting, and use less history states.
In the top right under Advanced settings you can further optimize your usage. I’m working with Basic Drawing Mode, and have 30 Bit Display unchecked.

Efficiency percentages
In the bottom left corner of the Photoshop window, you have the option to view its Efficiency percentages. This will show you if and how much PS is struggling. Naturally you want to keep this number as high as possible. I can tell you from experience that working with 20% efficiency is impossible(!!).
In the BeArt Presets article mentioned above, they explain that when PS runs out of RAM, it uses a Page File, which actually slows performance down even further:
“When a program works with an extensive amount of information and this information doesn’t fit random access memory (RAM), the program starts to record data into a “page file” on a hard drive. Namely, the file fulfills the role of RAM. The trouble with the page file is that the data recording on hard drive goes on slower than on RAM…”

8 bit – 16 bit – 32 bit
These definitions have to do with how many colors are in your image. I’ve never used 32 bit. Working in 16 bit can offer you a large color range, but will further slow down performance.
My work method is to always save my original source files (scans, photos etc.) in the highest quality possible – High resolution, 16 bit – But work with the lower 8 bit range where I can
For example, I scan images in a very high resolution in 16 bit (in the scanner software it is referred to as 48 bit), and save the scans in 16 bit, so that I have the largest, highest quality original files for any future use, but for their implementations in Photoshop I mostly find 8 bit good enough.

Overlays: Grids & guides
Having overlay elements such as guides and grid view, also contributes to slow performance. So when I don’t need them I either remove unnecessary guides, or at least hide them from view. My rationale is that these are additional elements PS needs to redraw with every slight change I make.
Navigator panel
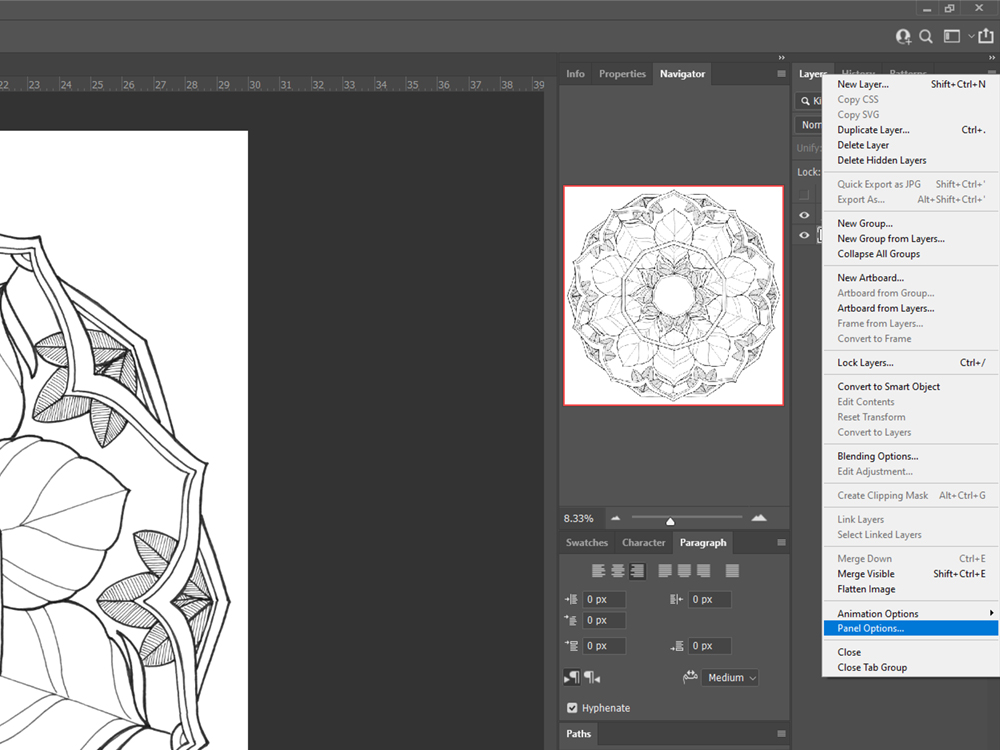
The same goes for the Navigation panel. I actually like using it, but try to minimize it when I don’t need it – Just think, when it is visible, PS needs to recreate your image twice with every shift in the view, with every line you draw.
Layers panel
A similar sort of recreating smaller representations of our image happens in the layers panel – Turning Layer Thumbnails off can reduce some of that extra effort. In Layer Options > Thumbnails > None.
Do the same for Channels if you use them.


Presets panels
Panel previews of Patterns, Library items, Brushes etc. also take their share of space. For me, the Patterns I use are quite large, so I saved them all separated into groups, and only upload the ones I need each time. I also keep the Patterns panel minimized when not in use.
One more note if you create patterns – Patterns that are 16 bit are even more of a load to the system, See if you can convert your image to 8 bit before saving as a pattern.

Conclusion
For those of us that find Photoshop an essential working tool, sluggish performance can be maddening. I hope you found some changes you can implement in your system that will improve your workflow.
This is by no means a complete list or guide, just some methods that work for me.
I’d love to hear your feedback – what methods work for you??
Don’t forget to Let Windows know you need Photoshop to be High Performance – see part 01